Alarm Object 
NOTE: For Canvas Series see Alarm Object for Canvas.
See also: User Interface
See also: Graphic Object Toolbox for Canvas Series
Topic Menu
Alarm Object Overview
This tool displays alarm summaries or logs as a list or an indicator button. Alarms can be accessed through the Home > Project Toolbox > Live Graphic Data > Graphic Alarms. User must be on a Screen and not in the Main work area in order to see the Objects Project Toolbox items.

The alarm object is a graphical object, which provides two mechanisms. The first is to visually indicate that alarms are unacknowledged, active, or recorded in the associated ALARM LOG. The second is to respond to touch (selection) and display the Alarm Viewer, which allows the user to view and optionally modify any of the alarms in the associated alarm log.
The alarm object must be configured for attachment to either the alarm summary log or the alarm history log. Selecting the summary log allows the alarm object to monitor for active and unacknowledged alarms. Selecting the history log allows the alarm object to display the history of alarm state changes. In addition to the alarm log, the alarm object must also be configured for which ALARM GROUP or groups to monitor. This provides a method of limiting a specific alarm object to only respond to a group (or subset) of alarms. Additionally, the group information is also passed to the alarm viewer such that it only displays entries from the selected group(s).
The alarm object also supports general object property’s attributes of Visible, Flash, and Enable input. This allows creative use of the object, for example: The Visible attribute can be tied indirectly (through ladder logic) to the alarm ladder indicators to allow an alarm object to become visible when alarms are present. The Flash attribute can be tied to ladder logic, which causes the legend to flash after alarms have not been acknowledged for some period of time. And the Enable input attribute can be tied to ladder logic that only allows operators with certain privileges can access the alarm viewer.
Return to the Top: Alarm Object
Alarm Object Configuration
Double clicking on the Alarm Object displays the following alarms object properties window.

Object Type
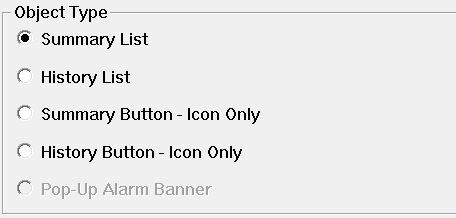
Summary List / History List - Specify which log to access. Summary contains the current alarm states while the History log maintains a history of each alarm change.
Note: User can still access Alarm Viewer window by touching on the alarm object list view.
Display Alarm Button/Icon Only
An option is provided to not show the partial list on the surface of the alarm object. Alternately, only the legend and an optional ICON are displayed. In addition, the background color of the alarm object is dynamically modified to reflect the state of entries in the associated alarm log.
These state colors are defined in the Alarms/Alarm Configuration Menu in the graphics editor and depend on which alarm log type is selected.

When a button/icon only alarm object is attached to the summary log and a new alarm occurs, the alarm object is displayed in the UNACK color to alert the operator than an unacknowledged alarm exists. The operator can then display the Alarm Viewer to acknowledge that alarm. On return, the alarm object is then displayed in the ACK color (if the alarm is still active). Once all alarms in the selected group(s) are acknowledged and inactive, the alarm object is displayed in the EMPTY color.
When a button/icon only alarm object is attached to the history log and a new alarm occurs, the alarm object is displayed in the Not-Empty-Color to alert the operator that entries now exist in the log. The operator can then display the alarm viewer to view and optionally clear the entry. If the alarm history log is full, the alarm object is displayed in the Full-color to alert the operator that entries are being deleted on new alarm state changes. Once all alarms in the selected group(s) are cleared (and the history log is NOT full) the alarm object is displayed in the EMPTY color.
Note that the alarm object’s list format parameters (font, fields and format) are STILL required for an alarm object configured for button/icon only since that information is required for the associated alarm viewer.
Default Display (partial list)
By default, the alarm object is configured to display the latest entries of the associated alarm log in list form on the surface of the object. Background color around the list, and a legend with a selectable font is also configurable. The list background is always white.
![]()
Only the topmost (newest) entries from the associated alarm log that fit in the alarm object’s list area are displayed. Each entries text color is based on its associated alarm point’s ALARM STATE. These list text colors are globally defined in the Alarms | Alarm Configuration Menu in the graphics editor. For example, when a new alarm occurs, its entries text is displayed in the ACT color at the top of the partial list to alert the operator. The operator can then display the Alarm Viewer and acknowledge that alarm. On return to the alarm object’s screen, that entries text color is changed to the ACK color. Should the operator fail to acknowledge the alarm before the alarm point returned to inactive, that entries text color is changed to the RTN color (if RTN Implies ACK is NOT active).
The display format of the list entries is configurable through the Alarm Object Properties dialog box. The displayed fields of time, date and state can be individually enabled (order of the fields in the message cannot be altered). Additionally, the specific time and date formats are selectable. The font of the entries is also selectable; however, since entries are limited to single line and clipped at the right edge of the alarm object, fonts sizes should be kept minimal.
Note also that the associated alarm viewer uses same field, format and font selections of the calling alarm object.
Items to Display

Unacked Only (available on partial list attachment to summary log only)
Only unacknowledged alarms are displayed on the partial list. This allows the user to ignore acknowledged active alarms. This option does NOT affect the alarm viewer, which displays all active and/or unacknowledged alarms.
Allow Operator to Clear
Enables the Clear/Clear All buttons when displaying the alarm viewer. When enabled, the operator is allowed to clear (remove) entries from either the summary or history logs.
Alarms Groups to Display

-
Alarm groups provide a way of categorizing alarms based on plant layout, machine group, control zone, or any other grouping of associated alarms. For example, consider a process with several machines and an OCS containing a user screen for each machine. Also assume that the process alarms could also be divided (or grouped) by machine. On each screen, an alarm object could then be configured to only report alarms associated with that corresponding machine.
-
Alarm points are assigned a group number when configured in the Alarm | Alarm Configuration menu. Several alarm points are “grouped” it they are all assigned the same group number. Up to 16 group numbers can be used.
-
While all alarms are written to a common summary log and history log, alarm objects and the associated Alarm Viewer that access these logs are configurable to selectively filter entries. Filtering is accomplished by specifying the alarm group or groups that each alarm object can access.
List Format

-
Font - Specifies font used by both the partial list and the Alarm Viewer.
-
Date - This checkbox enables the display of the date of occurrence for each alarm in both the partial list and the alarm viewer. The corresponding list box allows selection of the specific date format.
-
Time - This checkbox enables the display of the time of occurrence for each alarm in both the partial list and the alarm viewer. The corresponding list box allows selection of the specific time format.
-
State - This checkbox enables the display of the state of each alarm in both the partial list and the alarm viewer
Keypress Source
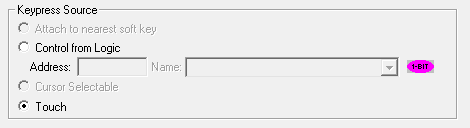
Keypress source options are used to enable the alarm viewer window either by touch option or Control from Logic address option. When the configured logic register goes high, alarm viewer window will be displayed.
Display Properties for Alarm

Attributes >>>
Selecting Attributes >>> opens the following dialog:

Visible
-
Non-touch units* - all objects are always visible, so as a result both the static and dynamic override fields will be grayed out.
-
Touch units** - the visibility attribute may be set as static or dynamic.
-
*Non-touch units include X2, XLE, and XLEe.
**Touch Units include all XL series, Prime Series, and Micro OCS series controllers.
-
When the attribute is statically set to ON, the object is always visible and always responds to touch signals.
-
When the attribute is statically set invisible (unchecked) the object is not drawn but if the object is the front most object it responds to touch signals. For example, placing a statically invisible screen jump object in front of a bitmap allows the bitmap to be drawn but touching the location of the invisible screen jump causes the screen jump action to be performed.
-
When this attribute is dynamically enabled the visibility of the object is controlled by the associated bit in the override register. When the bit is ON the object is drawn and operates normally. When the bit is OFF the object is not drawn and does respond to any touch signals.
Enable Input – This attribute, optionally available only as dynamically overridden, allows the object or the object editor to ignore keystrokes directed to that object. This allows run-time determination on whether to restrict input access to that object. This allows the user to create operator privilege or in-motion lockout of object modification. If this box is NOT checked, the associated object always accepts input.
Color – This attribute allows some objects to dynamically change colors. Up to four additional colors can be selected for an object. If none of the color attribute override bits are set the object defaults to the color chosen in the main object properties.
Dynamic
Override variable – This register/variable is used to control the dynamic properties like visible, Flash, Enable Input and Colors.
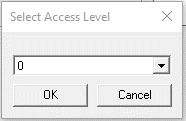
Access Level
User can assign access level to this particular object. Selecting Access>> option opens up Select Access Level window, where user can select access level from 0 to 7 in the drop down as shown. User logged in with the configured access level (of ASCII object) only will have access to the object.
Legend>>>
Selecting Legend >>> button displays the following window:
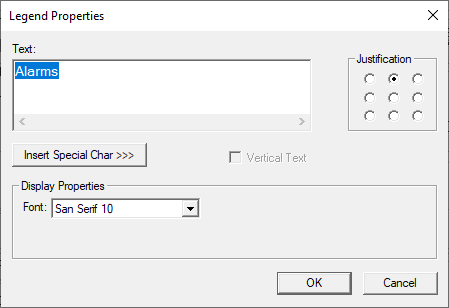
Text – User can configure a descriptive text (legend) to be included with-in the objects bounding rectangle. Returns may be inserted for multiple lines.
Justification – This option is used to display the legend text in the configured position within a graphic object.
Font – User can select the available fonts / font size to be applied to legend text.
Insert Special Char >>> - Selecting this option displays the following window wherein user can select different fonts / special characters available to be added in legend:

Legend / Line Color >>>
Selecting Legend / Line Color >>> option displays the Color Picker.
Color Picker
Applies the selected color from color picker as solid background color for the graphic object.
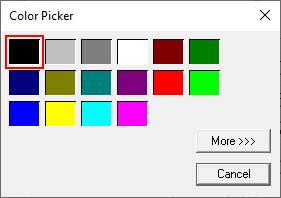
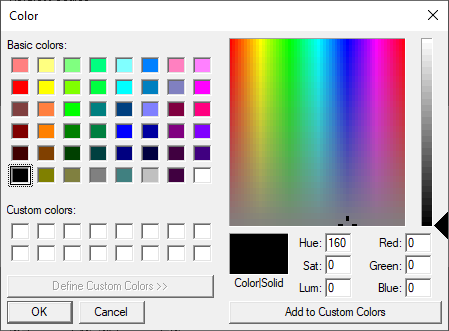
Selecting More >>> displays the following window allowing user to select color apart from default colors available in the above displayed color picker window.
Return to the Top: Alarm Object