Wi-Fi Guide
See also: Hardware Configuration
Topic Menu
Wi-Fi Configuration
USB Wi-Fi module provides both client and access point support to OCS units that support USB Host connections. USB Wi-Fi is supported in XL4, XL7, EXL10, EXL6, EXLW, RCC2414, X5 and XL15+ models. As an access point, OCS allows other Wi-Fi devices to connect to a wired network. Using client mode, the OCS can connect to an established Wi-Fi network. As an Access point or client mode user can connect laptops for programming or phones and tablets for WebMI![]() WebMI – Web-Machine Interface - An HTML5-based HTTP server, where access to data and visualizations is enabled from anywhere via web clients. WebMI empowers users to control everything onscreen from a computer, tablet, or other mobile device..and Ethernet protocols supported by the OCS, excluding NTP
WebMI – Web-Machine Interface - An HTML5-based HTTP server, where access to data and visualizations is enabled from anywhere via web clients. WebMI empowers users to control everything onscreen from a computer, tablet, or other mobile device..and Ethernet protocols supported by the OCS, excluding NTP![]() NTP - Network Time Protocol (obtain clock from web-based server) - For clock synchronization between computer systems over packet-switched, variable latency data networks. and Ethernet IP Protocols can be accessed via Wi-Fi connectivity.
NTP - Network Time Protocol (obtain clock from web-based server) - For clock synchronization between computer systems over packet-switched, variable latency data networks. and Ethernet IP Protocols can be accessed via Wi-Fi connectivity.
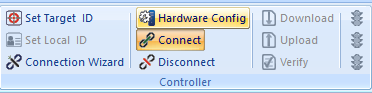
With device connected (where Wi-Fi is supported), there are two options to open Hardware Configuration:
Option A: Select Home > Controller > Hardware Configuration to open Hardware Configuration.
Option B: Select Hardware Configuration in the Project Navigator tree.
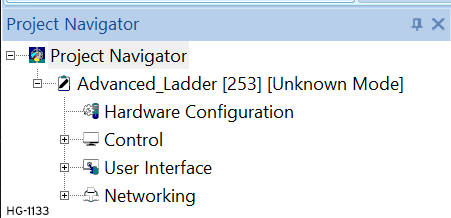
The following dialog will open:
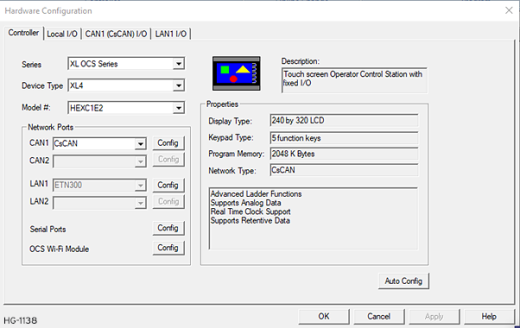
Select Config option next to OCS Wi-Fi Module, the following window will be displayed:
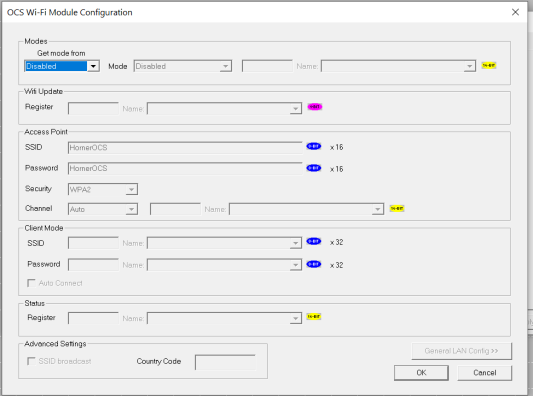
Modes

Get mode from has the following options:
-
Configuration - Whatever mode is selected from drop down will be considered.
-
Register - The user can change the mode from register by moving a corresponding value, that is if the user wants to dynamically change the mode.
-
Disabled - WiFi option will be disabled.
Disabled = 0
Access Point = 1
Client = 2
Following modes are supported:

-
Disabled - Wi-Fi will be disabled.
-
Access Point - In Access Point mode a connection from up to 8 wireless devices can be made to the OCS. This would allow WebMI or any other Ethernet based protocol as well.
-
Client - This mode allows connecting an OCS to another router or access point including another OCS in access point mode.
Wi-Fi Update

This option is used only when Wi-Fi configuration needs to be updated dynamically. When the register/variable is set to "1" or "high", Wi-Fi configuration will be updated.
Note: The Wi-Fi Update Register resets itself automatically.
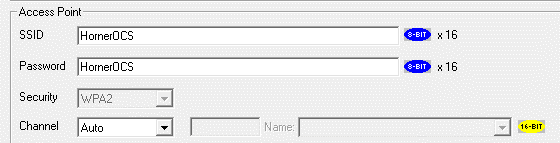
Access Point
-
SSID - This is a unique ID that consists of 16 characters and is used for naming wireless networks. This field can be configured either with constants or via register/variable.
-
Password - This is the password that is set for the SSID. This field can be configured either with constants or via register/variable.
-
Security - As of now, this option is set to WPA2.
-
Channel - The following channels are supported - Auto, Channel 1, Channel 6 and Channel 11. The channel can be selected from the drop-down box or it can be configured using registers/variable to change it dynamically by moving corresponding value to the register/variable.
Channel 1 = 1
Channel 6 = 2
Channel 11 = 3
else Auto.
Note:
1. Allowed special character
in SSID or Password is is ~!@#$%^*_+-=.
2. Access Point SSID Minimum
allowed length is 4
3. Access Point SSID Maximum
allowed length is 16
4. Access Point password Minimum
allowed length is 8
5. Access Point password Maximum
allowed length is 16
Return to the Top: Wi-Fi Guide
Client Mode

-
SSID - This is a unique ID that consists of 32 characters and is used for naming wireless networks. This field can be configured either with constants or via registers.
-
Password - This is the password that is set for the SSID. This field can be configured either with constants or via registers.
-
Auto Connect - Selecting this option connects to the previously established connection (SSID) automatically.
Note:
1. Allowed special character in SSID or Password is ~!@#$%^*_+-=.
2. Client Mode SSID Maximum allowed length is 32
3. Client Mode password Maximum allowed length is 32
Status

This field displays the status of Wi-Fi connectivity and the details are as follows:
First 8 bits (LSB)
Bit 0 = High if WIFI Module is connected / Low if WIFI Module is disconnected
Bit 1 = High when Access Point is established successfully
Bit 2 = High when Client mode is connected successfully
Bit 3 = High when Scanning in Client mode (Scan mode is to scan for available networks. This mode is available only in the System menu of device)
Bit 4 = It will be set if configured Access Point SSID is invalid
Bit 5 = It will be set if configured Access Point password is invalid
Bit 6 = It will be set if default Access Point mode SSID or Password is applied
Second 8 bits (MSB)
Displays the signal strength when device is in client mode.
None = 0
Weak = 1
Fair = 2
Good = 3
Excellent = 4
Return to the Top: Wi-Fi Guide
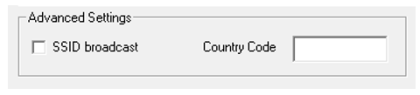
Advanced Settings
-
SSID broadcast - It is the continuous transmission of packets from a Wi-Fi access point that announces its availability. Selecting this option makes the SSID to be visible to other devices.
-
Country Code - This is the country code where the Wi-Fi router is currently being operated.
Return to the Top: Wi-Fi Guide
General LAN Config

In OCS Wi-Fi Module configuration dialog, clicking on General LAN Config>> button will display the following window, where the user can configure the Ethernet protocols to be accessed via Wi-Fi connectivity.
Home > Program > Hardware Configuration
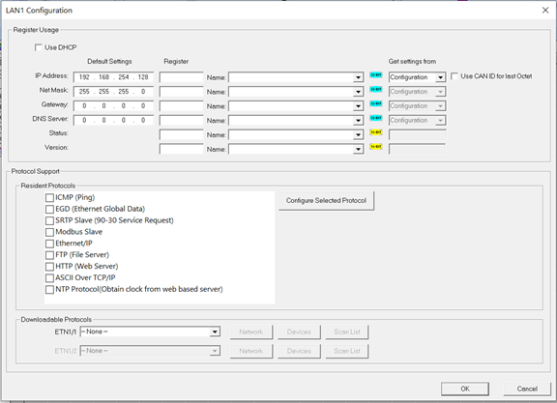
See Also: Ethernet Configuration Overview
Return to the Top: Wi-Fi Guide
Wi-Fi Configuration via System Menu
Each OCS controller has a built-in System Menu, which allows the user to view the System Settings and make adjustments. Press the SYSTEM Key or press in the upper right corner of the screen if no buttons are visible to open the System Menu. Then use the up or down arrows to select and display the Wi-Fi Setting sub menu.
The HE-WIFI USB can be set up in either Access Point Mode or Client Mode.
-
Access Point - In Access Point mode a connection from up to 8 wireless devices can be made to the OCS. This would allow WebMI or any other Ethernet based protocol as well.
-
Client - This mode allows connecting an OCS to another router or access point including another OCS in access point mode.
Setting up Wi-Fi
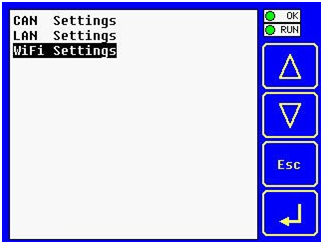
Step 1: In the System Menu, select Set Networks.
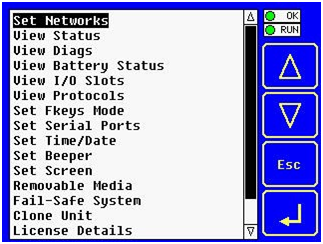
Step 2: In the Set Networks screen, select WiFi Settings.
Return to the Top: Wi-Fi Guide
Access Point Mode
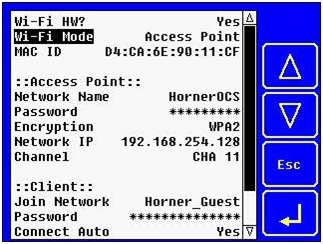
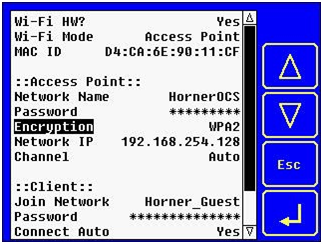
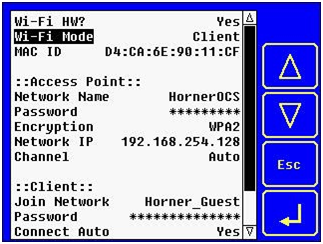
Note: If a HE-WIFIUSB is plugged into the OCS, the Wi-Fi HW? will indicate Yes.
Using the arrow buttons, select Wi-Fi Mode, then press the Enter arrow at the bottom right of the screen. The text to the right of Wi-Fi Mode will then be highlighted with options for Access Point, Client, or Disable. For Access Point Mode, select Access Point.
Setting up Access Point Mode
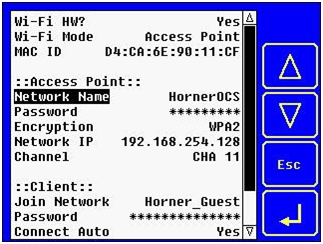
Step 1: Ensure that Wi-Fi Mode is set to Access Point.
Step 2: Using arrow keys, scroll down to Network Name and press the Enter arrow. This will open a numeric keypad with options for an alphabet and a symbols keypad. See below. Using required keypads, type in the network name and press Enter.


Step 3: Once Network Name is entered, use the arrows to scroll to Password and press the Enter arrow. Once again, the Numeric keypad will appear with options to use the alphabet and symbols keypad. Type in password and press Enter.
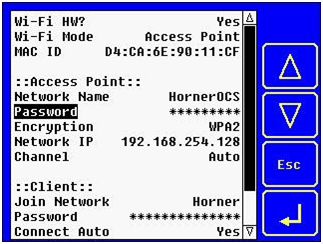
Note: The Encryption information will auto populate. See below:
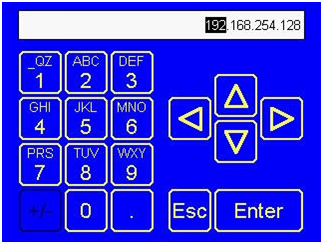
Step 4: Using the Arrow button, scroll down to Network IP and press the Enter arrow.
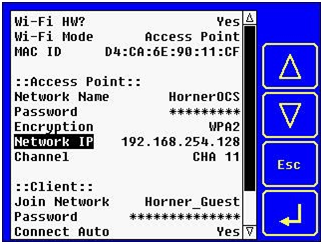
Step 5: A numeric keypad will open to add the IP Address. Add address and select Enter.
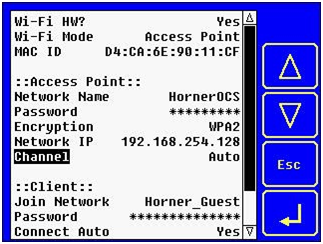
Step 6: Use the arrow button to scroll down to Channel. Then press the Enter arrow. Once the text to the right of Channel is highlighted, use an up or down arrow button to select one of the channel options that are supported: Auto, Channel 1, Channel 6 or Channel 11.
Return to the Top: Wi-Fi Guide
Client Mode
Note: If a HE-WIFI USB is plugged into the OCS, the Wi-Fi HW? will indicate Yes.
Using the arrow buttons, select Wi-Fi Mode, then press the Enter arrow at the bottom right of the screen. The text to the right of Wi-Fi Mode will then be highlighted with options for Access Point, Client or Disable. For Client Mode, select Client.
Setting up Client Mode
Step 1: Ensure that Wi-Fi Mode is set to Client.
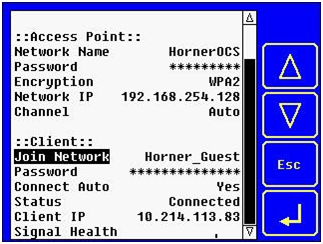
Step 2: Using arrow keys, scroll down to Join Network and press the Enter arrow.
Step 3: Select Join Network and the following screen will appear:

Once the HE-WIFIUSB has detected Access Points, the following screen will appear. Using the up or down arrows, select an Access Point. The small vertical lines to the right of the Access Point names indicate the Wi-Fi signal strength.
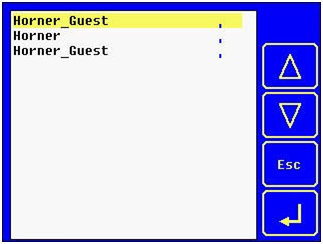
Note: This screen shows example names of Wi-Fi Access Points.
Step 4: Once Join Network information is entered, use the arrows to scroll to Password and press the Enter arrow. Once again, the Numeric keypad will appear with options to use the alphabet and symbols keypad. Type in password and press Enter.
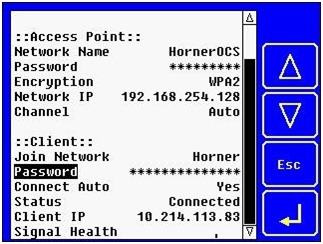
This will open a numeric keypad with options for an alphabet and a symbols keypad. Using the keypad type in the password and press Enter.
Step 5: Using the down arrow, scroll down to Connect Auto and press the Enter arrow. Select either Yes or No by using the up or down arrows.
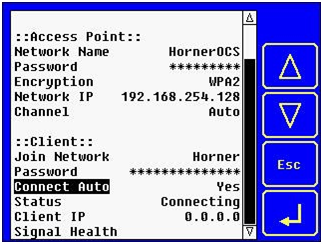
The Status and Client IP fields will auto populate and the Signal Health information will update automatically.
Return to the Top: Wi-Fi Guide