Animated Picture/Graphic Object 
Note: For Canvas Series see Animated Picture/Graphic for Canvas .
See also: User Interface
See also: Graphic Object Toolbox for Canvas Series
Topic Menu
Overview of Animation Object

|
Using Graphics and Animation |
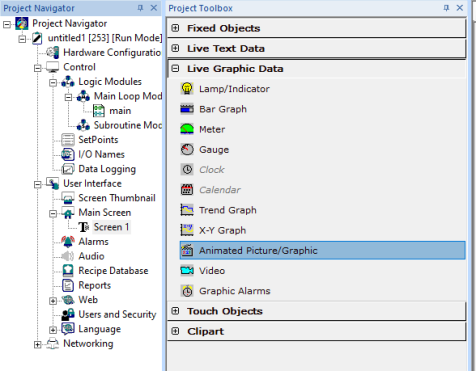
This displays bitmap (frame) based on enumerated value of controller register. The Animated Image can be accessed through the Home > Project Toolbox > Live Graphic Data > Animated Picture/Graphic. User must be on a Screen and not in the Main work area in order to see the Objects Project Toolbox items.
Allows insertion of one of several Window’s Bitmap file(s) (.BMP) on a display screen based on the state of the control register. The control register is sampled continuously and treated as an unsigned value. When the sampled value changes, the bitmap associated with the frame number equal to the sampled value is displayed. If the sampled value is greater than the largest defined frame number, the bitmap associated with the largest defined frame number is displayed.
Return to the Top: Animated Picture/Graphic Object
Animation Properties
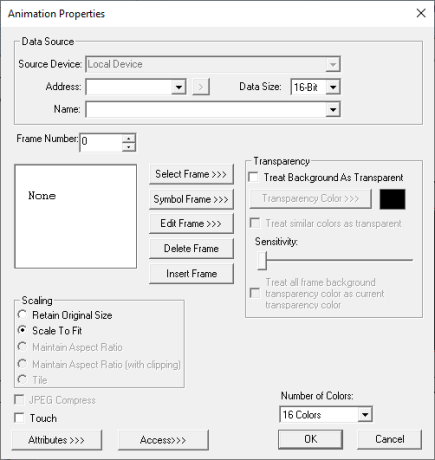
Double clicking on the object icon displays the following properties window:
Controller Register
This object will accept any register type and size; however, Register Width field must specify 1-bit type for discrete register types (%I, %Q, etc). Register Width will also specify the number of bits to convert for an analog value.
Data Source
External Registers - To view data on the screen from an external device connected using configurable protocols, it is required to map the data into OCS registers / variables and then display the data on the screen. The external registers (registers / variables of the device connected to OCS through serial / Ethernet protocols) can be directly accessed from the graphics objects. This provides three major benefits:
-
Ease of programming
-
Reduced register / variable usage
-
Data transferred only when required
Accessing External Registers - Configure the protocol for communication with the external device.
Note: The scan list configuration is not required if the user wants to only access the data of external device from the OCS screens.
-
Place the graphics object for displaying the data and double click to configure its properties. Select the required protocol from the Data Source dropdown.
-
Enter the parameter address / variables of the external device parameters. Select the register / variable width for the configured external parameter.
-
When the OCS switches to the screen having objects with external registers in RUN mode, the data is polled from the external device and displayed on the screen.
Internal Register - This section specifies the main OCS register / variable that is associated with the object. Depending on the individual object’s functionality, this register / variable may be read, written or both by the object. This section may contain up to three fields. The first field contains the action register / variable designation (i.e., %R12 / Var_1). The second field allows the register selection by alias name. The third field is only present on objects that accept multiple data sizes and is used to select binary (1bit) or analog (8, 16 or 32 bits).
Animation Properties
-
Frame Number - Selects the frame number to associate a bitmap too.
-
Symbol Frame >>> - If the symbol picker is installed, allows selection of a symbol as a frame.
-
Edit Frame >>> - Opens the configured bitmap editor with selected frame bitmap. NOTE: The Tools/Set Bmp Editor… must be configured to the file location of a bitmap (bmp) editor. Generally, this is MS Paint which is supplied as part of the Windows or NT operating system.
-
Delete Frame - Deletes bitmap at the current frame number and move all bitmaps at higher frame numbers down by one. Deletes a bitmap from a sequence of frames.
-
Insert Frame - Moves all bitmaps at and above current frame number up by one. Opens up space in a sequence for the addition (Pick) of a bitmap.
-
Retain Original Size - Retains bitmap to original.
-
Scale to Fit - Resizes imported bitmap(s) to match bounds of object. If not selected, the object’s lower-right bounds are recalculated to match the ’first frame’ bitmap’s dimensions. If the bitmap is larger than the screen or the ’first frame’ bitmap, it is clipped appropriately
-
JPEG Compress - Allows the Bitmap images to be compressed in JPEG format to store an increased number of images. This option is available only for Linux devices and will be enabled only for images with 32768.
-
Touch - From Cscape 9.60 SP2 and firmware 14.08, animated bitmaps are provided with "Touch" option. By selecting this option, user can change the animation bitmap frames by touching on the controller instead of configuring it in ladder program.
Transparency
![]()
Treat Background As Transparent - In Animation properties window, select Treat Background As Transparent option and select the color which needs to appear transparent.
Transparency Color >>> - Selecting this option opens up color picker where in the selected color will be applied as background color for the bitmap. Applies the selected color from The Color Picker as solid background color for the graphic object.
The Color Picker
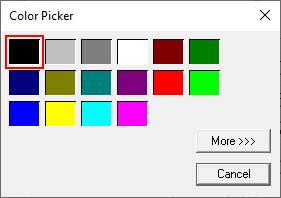
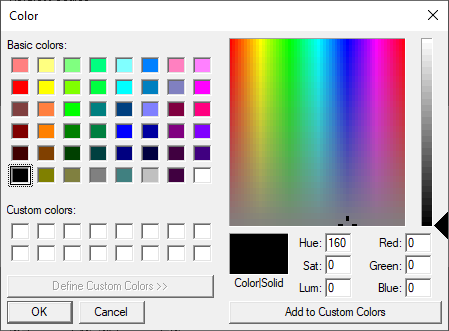
Selecting More >>> displays the following window allowing user to select color apart from default colors available in the above displayed color picker window.
Note: Both "JPEG Compress" and "Treat Background As Transparent" options cannot be selected for an object.
Treat similar colors as transparent - Selecting this option allows Cscape to automatically convert pixels in bitmaps that have transparencies to almost match the transparency color. By selecting the sensitivity range (i.e, by moving the slider to required position), the transparency color density will be reduced.
Treat All Frame Background as Transparent as current transparency color - Selecting this option applies transparency color (color that is configured in Treat Background As Transparent) to all the configured frames.
Attributes >>>
Selecting Attributes >>> opens the following dialog:
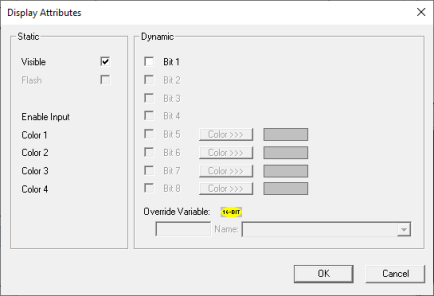
Static
Visible
-
Non-touch units* - all objects are always visible, so as a result both the static and dynamic override fields will be grayed out.
-
Touch units** - the visibility attribute may be set as static or dynamic.
-
*Non-touch units include X2, XLE, and XLEe.
**Touch Units include all XL series, Prime Series, and Micro OCS series controllers.
-
When the attribute is statically set to ON, the object is always visible and always responds to touch signals.
-
When the attribute is statically set invisible (unchecked) the object is not drawn but if the object is the front most object it responds to touch signals. For example, placing a statically invisible screen jump object in front of a bitmap allows the bitmap to be drawn but touching the location of the invisible screen jump causes the screen jump action to be performed.
-
When this attribute is dynamically enabled the visibility of the object is controlled by the associated bit in the override register. When the bit is ON the object is drawn and operates normally. When the bit is OFF the object is not drawn and does respond to any touch signals.
Dynamic
Override variable – This register/variable is used to control the dynamic properties like visible, Flash, Enable Input and Colors.
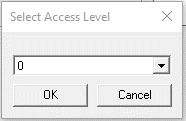
Access Level
User can assign access level to this particular object. Selecting Access>> option opens up Select Access Level window, where user can select access level from 0 to 7 in the drop down as shown. User logged in with the configured access level (of ASCII object) only will have access to the object.
Return to the Top: Animated Picture/Graphic Object